Shadow Spell and Post Process Breakdown
In this breakdown we will looking into post process and we’re diving into the shadow spell.
Teaser here for more info - https://youtu.be/7bVKN0vEZvk
Let me share a cool trick I learned while working on this project. So, I started by using the spiral tool in Houdini to create a mesh. Then, I thought, "What if I add a cross-section to make these swirls pop?" Well, here's where it gets interesting. I tested both versions in Unreal Engine 5. The cross-section looked cool, but it doubled our overdraw count! The visual improvement wasn't worth the performance hit, so I had to get creative. Here's the solution I came up with. I made a tube swirl instead and used a masked material on it. Not only was this way easier on performance, but it also gave us some sweet highlights from the scene light. I also added vertex colour to the meshes so I could fade my textures.
After sorting out the meshes, I jumped into Substance Designer to make some cool textures. I figured I'd need a trail for the swirls and I knew I had to create some smoky textures too. Those would come in handy for adding some neat little details to the cast and other stuff.
Once I've got all my stuff ready, I whip up some materials for the swirls, sparks, and smoke. It's pretty basic stuff—just messing with UV distortion and using vertex colour to mask the swirls. Nothing too fancy. Trying to keep it simple and make is visually plesing.
I've got the visuals, animation, and blueprint sorted, it's time to fine-tune things. We need to juggle the particle count and overdraw to keep everything looking sweet without bogging down performance. I threw in some collisions, too. It kicks in right when the attack happens, stunning the enemy character. Collisions can be a bit of a headache, but getting them to trigger at just the right moment did the trick.
I used paragon assets and character for the scene, it always a bit tricky with those as I’m searching for suitable animation for my VFX. Animation montage comes very handy so I can trim and time my animations there. Also it always me to get a bit creative with those assets by reversing some animations and adjusting play rate values to make sure the transitions are smooth.
Here's the final VFX. To finish this project, I've added post-process effects with volume adjustments. If you're interested, you can find the post-process breakdown below.
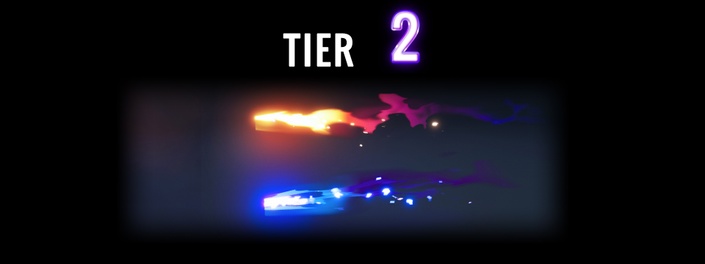
I discovered two ways to apply additional post-processing to the scene while our character is casting a spell. The first and easiest method was to tweak values via blueprint of the post-processing volume. This allowed us to add various scene changes such as darkening the screen corners using vignette, sharpening the visuals, and increasing contrast. The second approach involves adding a post-process material, and this is where things get exciting. We can apply textures to the screen, distort it over time, and really dive deep into creating amazing visuals using various material tricks. Below, you'll see an example of the post-process tweaks I've used for this character's spell.
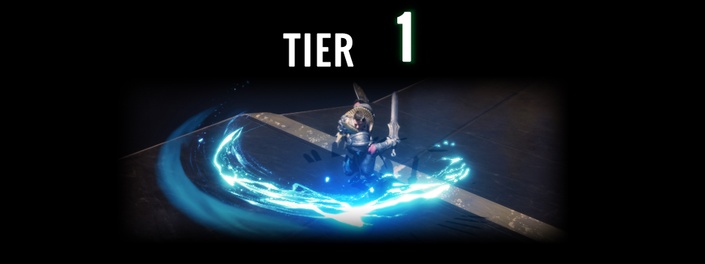
All those visuals including shadow spell and post processing volume changes are available in a form of tutorial where we dive into making those VFX and scene adjustments from scratch for tier 1 members on www.1mafx.com If you’ll like to learn how to make realtime VFX for games you can subscribe and get access to whole library of tutorials including intro to substance designer and intro to unreal engine.
More details video breakdown here
https://www.youtube.com/watch?v=LuallhFzdGA
Explore Tiers and learn how to make VFX like this one
Showcase other available courses, bundles, and coaching products you’re selling with the Featured Products block to provide alternatives to visitors who may not be interested in this specific product.